NUnite Lite Runner
NUnitLite started out life as a separate version of the NUnit framework, with fewer features and a built-in test runner. It ran on devices as well as on desktop .NET and mono and allowed users to create executable tests without the overhead of a full NUnit installation.
With NUnit 3.0, the NUnitLite framework has been merged with the full NUnit framework. There is now only one framework, nunit.framework.dll. The built-in runner, which was a part of the old NUnitLite, is now packaged as nunitlite.dll.
Using NUnitLite
To run tests under NUnitLite, proceed as follows:
- You can use your existing unit test project (created with the
dotnet new nunitcommand or from Visual Studio) or create a new console application. If you use an existing test project you will get a warning about duplicate entry points. This can be ignored.
Using a standard test project has the benefit that you can use both the standard dotnet test command, the Visual
Studio Test Explorer and the NUnitLite runner to run your tests.
- Make sure your test assembly references both nunit.framework and nunitlite.
<PackageReference Include="NUnitLite" Version="4.0.1" />
<PackageReference Include="NUnit" Version="4.0.1" />
Optionally you can set the OutputType in a PropertyGroup to Exe, which allows you to run the tests directly and
without the dotnet run.
<OutputType>Exe</OutputType>
- Add a
Program.cscontaining a top level statements main routine like:
using NUnitLite;

return new AutoRun().Execute(args);
If you don't use top-level statements, then just create a standard main routine with the same code.
- Execute your test application in order to run the tests.
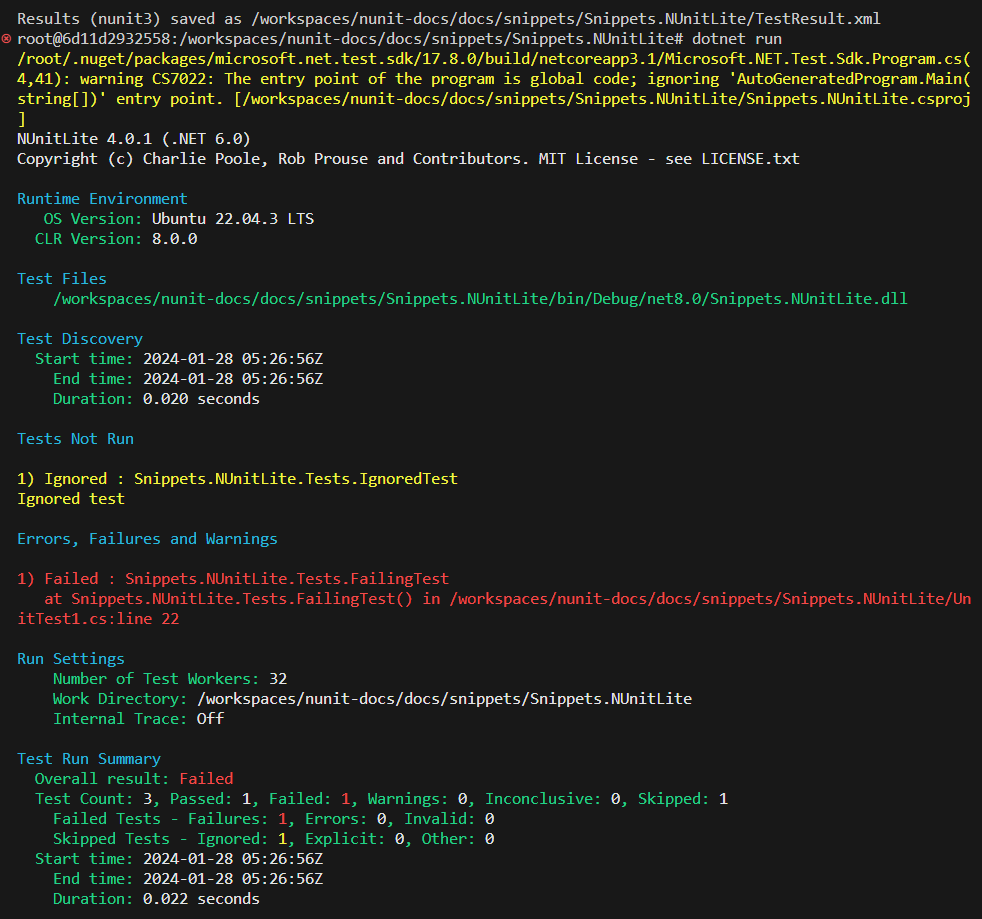
dotnet run
If you install the NUnitLite runner via the NuGet package, steps 2 is handled automatically. Both assemblies are installed and referenced for you.
NUnitLite Output
As seen in the following screen shot, the output from an NUnitLite run is quite similar to that from the console runner.
